Steaming open a freshly made bao is an experience: the soft, pillowy dough yielding to a fragrant, savory, or sweet filling. But for many home cooks, the idea of crafting these delectable Chinese steamed buns from scratch feels like a culinary Everest. Fear not. Understanding "How Bao is Made: Dough & Steaming Techniques" isn't about mastering ancient secrets; it's about appreciating a few fundamental principles of dough and steam.
This guide will demystify the art of bao-making, turning a seemingly complex process into an enjoyable, rewarding kitchen adventure. We'll dive deep into the science behind that perfect bao dough and the precise techniques for steaming it to fluffy perfection, ensuring you can replicate authentic, restaurant-quality results right in your own kitchen.
At a Glance: Crafting Perfect Bao
- Dough is Key: A tender, elastic dough is the foundation, requiring precise ingredient ratios and careful kneading.
- The Power of Yeast: Proper fermentation (rising) gives bao its signature light and airy texture.
- Precision Steaming: The right temperature, timing, and setup prevent sogginess and ensure even cooking.
- Ingredient Control: Making bao at home lets you customize fillings and ensures fresh, high-quality ingredients.
- Troubleshooting Common Issues: Learn to identify and fix problems like dense dough or sticky buns.
Why Make Your Own Bao? Beyond the Takeout Box
You've probably enjoyed bao from dim sum restaurants or frozen from an Asian grocery. They’re convenient, certainly. But like many culinary delights, the magic truly unfolds when you make them yourself. The benefits extend beyond bragging rights.
For starters, ingredient control is paramount. You dictate the quality of your flour, the freshness of your yeast, and the integrity of your fillings. This is especially valuable if you have dietary preferences or restrictions. Want a leaner pork filling, or a vibrant vegetarian option packed with seasonal greens? You've got the reins. This control also leads to a superior freshness and flavor that simply can't be matched by pre-made options. Imagine biting into a warm bun, fresh from the steamer, its aroma filling your kitchen – that's a sensory experience unique to homemade.
Then there's the cost-effectiveness. While an initial investment in ingredients might seem like a lot, the yield from a single batch often far surpasses what you'd get from a restaurant at a comparable price. Plus, the sheer joy of experimentation with fillings is endless. From classic Char Siu Bao to adventurous combinations like spicy kimchi and tofu, your kitchen becomes a canvas for culinary creativity.
Before we roll up our sleeves and dive into the dough, it's worth taking a moment to appreciate the incredible diversity of these steamed buns. From the iconic fluffy parcels we call bao to their unfilled brethren, Mantou, the world of bao offers a delightful journey through texture and taste.
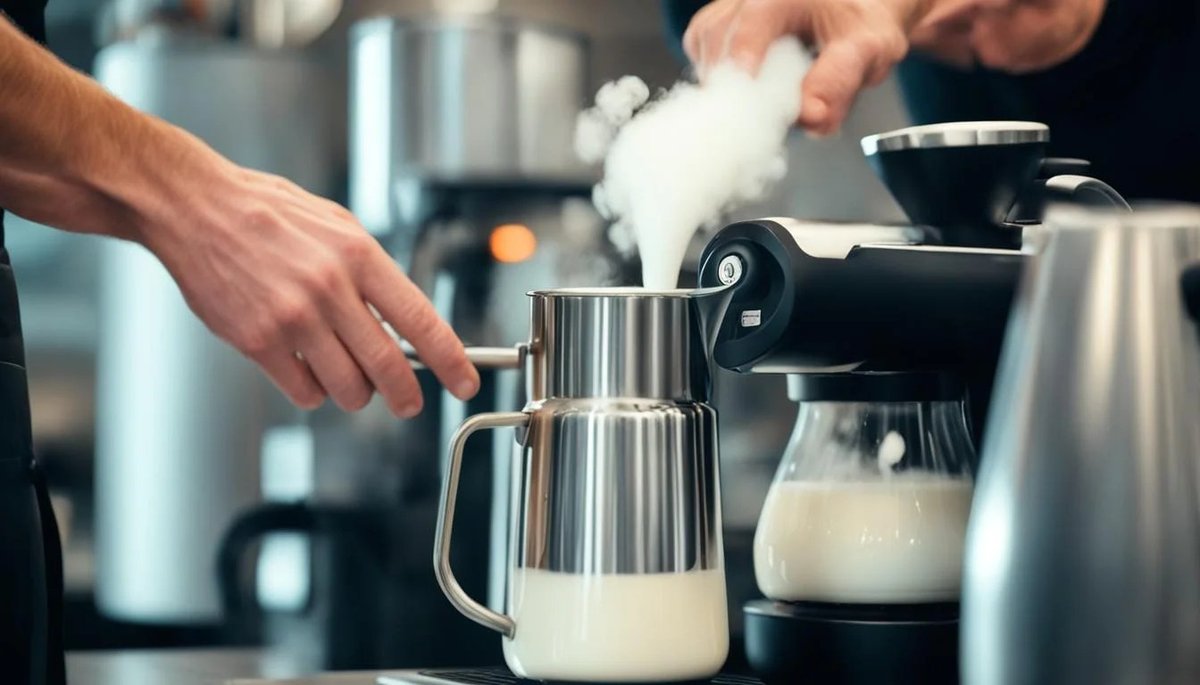
Gearing Up: Essential Equipment for Steaming Success
While making bao might sound specialized, the equipment needed is surprisingly accessible. You likely own most of it already.
The Steamer Basket: Your Best Friend
The undisputed king of bao steaming is the steamer basket.
- Bamboo steamers are popular for a reason. Their natural material absorbs excess moisture, preventing condensation from dripping back onto your bao and making them soggy. The woven design also ensures excellent airflow.
- Metal steamers are also effective and often more durable. Look for multi-tiered options that fit snugly over a pot.
- Silicone steamer baskets are a newer alternative, easy to clean, and flexible.
Regardless of material, ensure your steamer basket is large enough to accommodate your bao while allowing for crucial space between each bun (about an inch) to prevent sticking and facilitate even cooking. You'll also need a pot with a lid that's large enough for your steamer basket to sit comfortably inside, elevated above the water. A heat source (stovetop or electric kettle) completes the basic setup.
No Steamer? No Problem! Clever Alternatives
Don't have a dedicated steamer basket? You can still achieve perfectly steamed bao with a little ingenuity:
- Metal Colander or Strainer: Place a metal colander or large strainer over a pot of boiling water. Ensure the bottom of the colander doesn't touch the water. Arrange your bao inside, then cover the colander with a tight-fitting lid from another pot or even aluminum foil to trap the steam. Cook for 10-15 minutes, checking for doneness.
- Microwave-Safe Bowl/Container: For a quick fix, place a few bao in a microwave-safe bowl. Add a small amount of water (1-2 tablespoons) to the bowl. Cover it with a microwave-safe plate or lid and cook on high for 30-60 seconds. This method is best for reheating or steaming very small batches, as it can sometimes lead to a slightly chewier texture than traditional steaming.
Remember, the goal is to create a humid, enclosed environment where steam can circulate and cook the buns gently.
The Heart of the Bao: Mastering the Dough
The dough is arguably the most critical component of a perfect bao. Its texture dictates the overall experience – tender, fluffy, slightly chewy, or sadly, tough and dense. Getting it right involves a careful balance of ingredients and diligent technique.
Essential Dough Ingredients and Their Roles
Think of your bao dough as a blank canvas, ready to absorb flavor and provide that delightful chew. Here's what you'll need:
- Flour: This is where the magic happens.
- All-purpose flour is a good starting point, providing a decent balance.
- For a truly tender and fluffy bao, aim for medium to low gluten flour, typically under 11g protein per 100g. Flour with higher protein content (like bread flour) will yield a chewier, more substantial bun, which some prefer, but it might not be the cloud-like texture often associated with bao.
- Cake flour (8-9g protein) delivers the least chewy, most delicate texture. If you can't find cake flour, you can create a reasonable substitute by mixing 5 parts all-purpose flour to 1 part cornstarch (by weight), sifted to ensure even distribution. Crucially, avoid self-raising cake flour as it contains baking powder, which would disrupt your yeast's leavening process.
- Yeast: The lifeblood of your bao!
- Active dry or dried yeast is standard. It's what makes the dough rise and develop its airy structure. Typically, you'll use 2 teaspoons for 500g of flour. Ensure your yeast is fresh and active; old yeast is a common culprit for buns that don't rise. For tips on making sure your yeast is active and ready, check out our dedicated guide.
- Salt: Just a pinch enhances the flavor of the flour and helps regulate yeast activity. Don't skip it!
- Sugar: Feeds the yeast, promoting fermentation, and adds a subtle sweetness to the dough, balancing the savory fillings. Use roughly the same amount as your yeast, or slightly less.
- Water (lukewarm) and Milk: The liquid component. Lukewarm liquid is essential to activate the yeast without killing it. Milk contributes to a richer flavor, a softer crumb, and a whiter dough.
- Cooking Oil: A neutral-tasting oil like rapeseed, sunflower, canola, or vegetable oil adds tenderness, prevents sticking, and helps create a smooth texture.
The Golden Ratios (By Weight)
For consistent results, understanding these ratios is invaluable:
- Flour & Liquid (Water + Oil) Ratio: 2:1 (e.g., 500g flour to 250g total liquid)
- Water & Oil Ratio: 10:1 (e.g., 225g water to 25g oil, for a total of 250g liquid)
These ratios provide a great starting point, though slight adjustments may be needed based on humidity and flour type.
Step-by-Step: Crafting the Perfect Bao Dough
Now, let's get our hands floury.
1. Combining Dry Ingredients
In a large mixing bowl, whisk together your flour, yeast, salt, and sugar. Ensure they're well combined so the yeast is evenly distributed.
2. Adding Wet Ingredients
Gradually pour in your lukewarm water and milk, followed by the cooking oil. Mix with a spoon or your hands until a shaggy, somewhat sticky dough forms. At this stage, it won't look pretty, but that's normal.
3. The Art of Kneading
This is where you develop the gluten, which gives your bao its structure and chewiness.
- By Hand: Turn the shaggy dough out onto a lightly floured surface. Knead for about 10 minutes. Push the dough away with the heel of your hand, fold it back, rotate, and repeat. You're looking for a smooth, elastic dough that springs back when gently poked. Proper kneading creates an even network of air bubbles, leading to that desirable smooth appearance.
- With a Stand Mixer: Use the dough hook attachment and knead on medium-low speed for about 5 minutes. The dough should pull away from the sides of the bowl. You might want to finish by hand for a minute or two to ensure it's perfectly smooth.
Kneading Wisdom: - Over-kneading can lead to a dense, tough bao, as the gluten becomes too tight.
- Insufficient kneading results in a rough, "pot-marked" look and a less tender texture.
- An added bonus: kneading also helps lighten the dough's color, contributing to that characteristic white bao.
4. First Rise (Bulk Fermentation)
Place your kneaded dough into a lightly oiled bowl, turning it once to coat. Cover the bowl with a damp cloth or plastic wrap. This step, called the first rise or bulk fermentation, allows the yeast to work its magic.
- Rest until its size doubles. This can take anywhere from 40 minutes to 1.5 hours, depending on the ambient temperature.
- Accelerate the process: Place the bowl in a warm area. Think near a radiator, in a slightly preheated (then turned off) oven, inside a microwave with a cup of hot water, or even atop a warm dryer.
- The damp cloth helps maintain humidity, preventing the dough from drying out and forming a crust.
5. Second Kneading (Degassing)
Once the dough has doubled, gently punch it down to release the trapped air bubbles. Turn it out onto a lightly floured surface and knead it again for a minute or two. This second kneading is crucial: it removes large air pockets, creating a finer, more even crumb, and returns the dough to its original smooth, elastic texture.
6. Second Rise (Proofing)
After you've shaped your dough into individual bao (we'll cover this next!), place them on parchment paper squares in your steamer basket. Leave them to rise a second time for about 15 minutes before steaming. This final proofing ensures your bao are light and fluffy.
Crafting the Filling: A World of Flavors
While the dough is essential, the filling is the soul of your bao. This is where your creativity truly shines.
Popular Filling Varieties
- Classic Pork: Think succulent Char Siu (Chinese BBQ pork) or a savory blend of ground pork, ginger, garlic, and soy sauce. To achieve that juicy, mouth-watering filling, many recipes call for adding a little water or stock to the pork mixture.
- Vegetable Powerhouses: Pickled vegetables, sautéed cabbage, carrots, mushrooms, and onions are fantastic options. Briefly stir-frying vegetables like carrots and onions before mixing them into your filling enhances their flavor and softens their texture, preventing them from being too crunchy inside the soft bun.
- Tofu & Beyond: Tofu, kimchi, spicy sauces, or even sweet fillings like red bean paste or custard are popular choices. Exploring various bao filling ideas can lead to some truly unique creations.
The key to a good filling is balance – a mix of textures and flavors that complement the soft dough. Ensure your filling isn't too wet, as this can make the dough soggy, but also not too dry, which results in a crumbly texture.
Assembling and Shaping Your Bao: The Artistic Touch
Once your dough is ready and your filling is prepped, it's time for the magic of assembly.
1. Divide and Conquer
Gently roll your dough into a log and divide it into small, even balls. Aim for a size roughly equivalent to a small egg for standard bao.
2. Roll It Out
Take one dough ball and, on a lightly floured surface, roll it into a thin circle. The edges should be slightly thinner than the center, creating a small border. This helps with sealing and ensures a delicate pleat.
3. Fill 'Er Up
Place 1 to 2 tablespoons of filling in the center of your rolled-out dough circle. Don't overfill, or sealing will be a nightmare.
4. Fold and Seal: The Signature Look
There are many ways to shape bao, but the simplest is often the best for beginners.
- Half-Moon Shape: Fold the dough over the filling to form a half-moon. Press the edges tightly together to seal, creating a secure crimp that prevents the filling from escaping during steaming.
- Pleated Round Bao: For a more traditional look, cup the dough in one hand and use your thumb and forefinger to gather and pleat the edges around the filling, twisting gently at the top to seal. This takes practice but results in beautiful, tightly sealed buns.
Tips for a Perfect Shape: - Even Dough Rolling: Consistency here means consistent cooking.
- Uniform Filling Distribution: Ensures each bite is balanced.
- Tools for Uniformity: A bamboo bao mold or even a small cup can help create uniformly sized and shaped buns, especially if you're aiming for aesthetic perfection.
- Tight Seal: This is crucial. A poorly sealed bao will burst open, spilling its delicious contents into the steamer.
Place each shaped bao onto a small square of parchment paper (this prevents sticking to the steamer and each other), then into your steamer basket, allowing ample space for their final rise and expansion.
The Grand Finale: Expert Steaming Techniques
You've kneaded, risen, filled, and shaped. Now comes the moment of truth: steaming. This process might seem simple, but a few key techniques ensure your bao emerge perfectly fluffy, not soggy.
The General Steaming Method
- Water Wisdom: Fill your pot with about 2-3 inches of water. You need enough to generate steam for the entire cooking time without boiling dry, but not so much that it touches the bottom of your steamer basket. Bring the water to a rapid boil over high heat.
- Bao in the Basket: While the water heats, arrange your shaped bao in the steamer basket. Crucially, leave at least an inch of space between each bun. They will expand significantly during steaming, and overcrowding leads to sticky, misshapen bao.
- Steam On! Once the water is boiling, reduce the heat to a steady simmer. Place your steamer basket over the pot and immediately cover it with a tight-fitting lid to trap the steam.
- Timing is Everything: Steam bao for 10-15 minutes, or until they are cooked through and wonderfully fluffy. The exact time depends on the size of your bao and the type of filling. Smaller bao (like mini Char Siu Bao) might only need 8-10 minutes, while larger, meatier buns could take 15-18.
- Checking for Doneness: A simple test: carefully insert a toothpick or thin skewer into the center of a bun. If it comes out clean, your bao is cooked. If it feels sticky or doughy, give it a few more minutes.
Essential Steaming Tips for Success
- Don't Overcrowd: Seriously, this is a top mistake. Give your bao room to breathe and grow.
- Maintain Consistent Heat: A gentle, steady simmer is ideal. Too high heat can lead to a chewy, tough exterior; too low, and they might not cook through properly.
- Resist the Urge to Peek: Opening the lid too early releases steam, causing the temperature to drop and potentially deflating your bao. Wait until the recommended cooking time is almost up.
- Avoid Oversteaming: Steaming bao for too long can make them dense, chewy, or even soggy. Stick to the suggested times and check for doneness.
- Prevent Water Drips: If you're using a metal lid, you might notice condensation dripping onto your bao. Wrap a clean kitchen towel around the lid or place a piece of cheesecloth under the lid to absorb excess moisture. Bamboo steamers naturally handle this better. If you’re facing common steamer issues and their fixes, don't despair – there's usually a simple solution.
Storing & Reheating Your Bao: Keeping Them Fresh
The best bao are fresh bao, but sometimes you'll have leftovers, or you'll want to prep ahead. Proper storage and reheating are key to enjoying their tender goodness later.
Storing Steamed Bao
- Refrigerator: Place cooled, steamed bao in an airtight container and store them in the refrigerator for up to 3 days.
- Freezer: For longer storage, freeze your bao. Once cooled, arrange them in a single layer on a baking sheet and freeze until solid (this prevents them from sticking together). Then transfer them to a freezer-safe bag or airtight container. They'll keep well for up to 2 months.
Reheating Steamed Bao
The goal is to bring them back to life without drying them out or making them rubbery.
- Steaming (Best Method): This is the ideal way to reheat. Place frozen bao directly into a steamer basket (no need to thaw) and steam for 10-15 minutes, or until heated through and soft. Refrigerated bao will only need 3-5 minutes.
- Microwave (Quick Method): Place 1-2 bao in a microwave-safe bowl, add a tablespoon of water, and cover. Microwave on high for 20-30 seconds for refrigerated bao, or 60-90 seconds for frozen. Be careful not to overheat, as this can make them tough and chewy.
- Toaster/Conventional Oven (for a Crispy Exterior): While not traditional, if you prefer a slightly crisped exterior on your bao (perhaps if they were fried after steaming), you can reheat them in a toaster or conventional oven at a low temperature (around 300°F / 150°C) for a few minutes. Wrap them loosely in foil to prevent excessive drying, or spray them lightly with water. This method is generally not recommended for preserving the classic soft, fluffy texture of steamed bao.
Tips for Lasting Freshness
- Airtight is Right: Always store bao in an airtight container to prevent them from drying out or absorbing refrigerator odors.
- Away from Elements: Keep stored bao away from direct sunlight and moisture, which can promote spoilage.
- Dough Enhancements: A traditional trick to preserve bao and prevent staleness is to add a few drops of vinegar or lemon juice to your dough mixture before steaming. The acidity helps to keep the dough soft and white.
- Freeze Early: For the best texture and flavor preservation, freeze bao as soon as possible after they've cooled down from steaming.
Troubleshooting Common Bao Blunders
Even experienced bao makers encounter issues. Here's how to diagnose and fix common problems:
- Problem: Dense, Tough Dough
- Cause: Often due to overworking the dough (too much kneading), using flour with too high protein content for your desired texture, or insufficient liquid.
- Solution: Reduce kneading time (especially if using a mixer), choose a medium-to-low protein all-purpose or cake flour blend, and ensure your flour-to-liquid ratio is correct. Sometimes, adding a tiny bit more oil can help.
- Problem: Bao Not Rising Properly
- Cause: This is almost always an issue with old or inactive yeast, or insufficient resting time/improper temperature during the rise.
- Solution: Always check your yeast's expiration date. If unsure, proof your yeast separately (mix with a pinch of sugar in warm water; it should foam within 5-10 minutes). Ensure your water and milk are lukewarm, not hot (which kills yeast) or cold (which slows it down). Provide a warm, draft-free environment for rising and be patient.
- Problem: Soggy, Wet Bao
- Cause: Steaming for too long, too much water in the pot touching the steamer, or condensation dripping from the lid.
- Solution: Monitor steaming time carefully. Ensure the water level in your pot is below the steamer basket. Use a bamboo steamer, or wrap a kitchen towel around a metal lid to absorb drips.
- Problem: Bao Collapsed or Wrinkly After Steaming
- Cause: Usually caused by a sudden change in temperature or pressure. This happens if you open the steamer lid too quickly or immediately after steaming, or if your yeast was extremely active and the buns over-proofed.
- Solution: Once steaming is done, turn off the heat and let the bao rest in the covered steamer for 2-5 minutes before carefully lifting the lid. This allows the internal pressure to equalize gradually. For extremely active yeast, slightly reduce proofing time.
Your Journey to Bao Bliss Begins Now
Making bao from scratch is more than just following a recipe; it's an exploration of dough, steam, and patience. By understanding the critical role of your ingredients, mastering the nuances of kneading and rising, and employing the right steaming techniques, you're not just cooking – you're engaging in a culinary tradition.
The satisfaction of pulling a perfectly steamed, fluffy bao from your basket, knowing you created every tender fold and flavorful filling, is immense. So, gather your ingredients, embrace the process, and prepare to delight your taste buds and impress your friends and family with homemade bao that rivals the best. Whether it's a simple Mantou or a rich char siu bao made with your own barbecue pork, your kitchen is now ready to become a bao haven. Happy steaming!